| Placeholder (Look back in two weeks) |
This is the original CAD drawing that I
created by tracing over an image of a reef shark downloaded from
somebody's underwater diving page. |
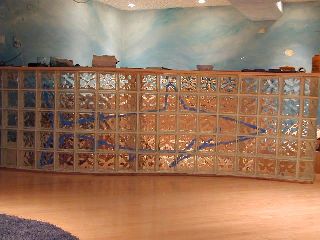 |
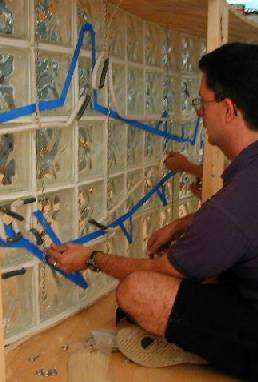
I had put blue tape on the inside of the
glass block to get a general idea how large to create the shark.
Although this was done well before I had the actual picture of the shark,
the size is overall size is approximately right. |
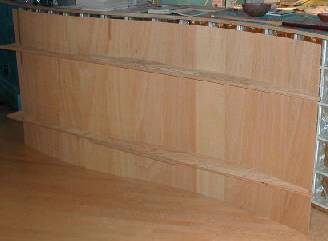 |
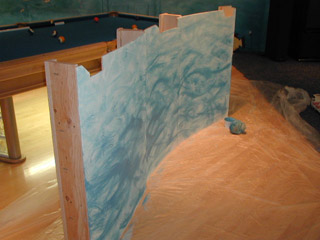
Next, I built this 40 inch by 8 foot form out
of plywood and "Wacky-Wood". (Bendable plywood - see it also in
action at the "Curved Stair Landing"
page) The form models the back glass surface of the "S"
shaped bar. The shark was going to have to be made to follow that
shape to within a couple of inches. By lying this form on its
straight "rails", a curved work surface is created on which the
neon is bent. The entire shark was assembled this way. |
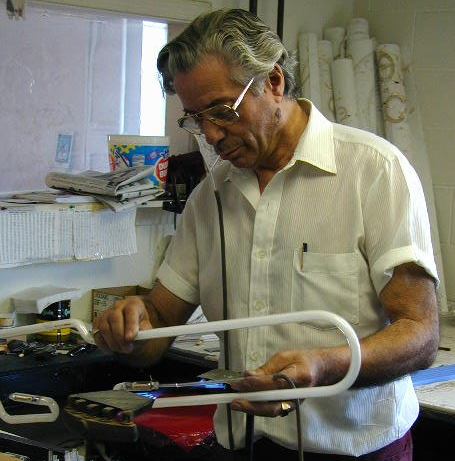 |
The creation of neon signs and art is quite
interesting. Shown here is Charlie from Custom
Neon & Sign Company (Burlington, Mass.) heating and bending
glass tubes as part of the overall process. Note the tube in his
mouth used to put just enough air pressure in the tube so that it doesn't
collapse during forming. This hyperlink to my neon
page is well worth a visit for a more in depth look at how this is
done. |
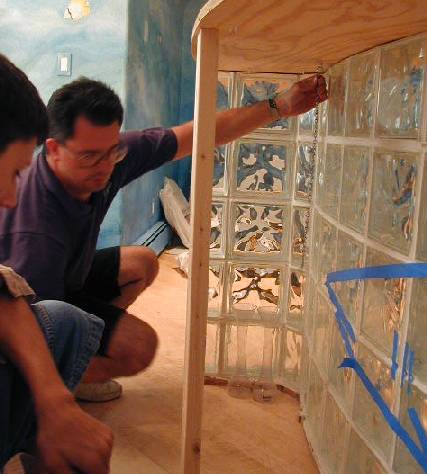 |
Now for the installation. Jimmy from
Custom Neon starts by hanging small chains from the underneath of the bar
top in strategic locations. To his left is his son and helper, Jim. |
 |
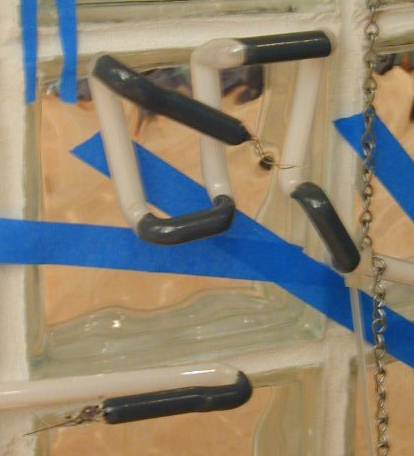
You can just about make out where the tubes
are hanging. (Don't be confused by that blue tape on the glass! The
neon tubes are white!) There are three separate pieces of
shark joined at various places. One of the joints is plainly
visible in the picture as the front of the dorsal (top) fin. These
joints get tied together with thin wire and some small padding material so
that the fish hangs as a unit. |
 |
Here's the section of the neon that forms the
three vertical gills of the fish. Note how the thick paint is used
to obscure the parts of the tube that shouldn't show. This section
is also at the end of one piece of neon, and so it terminates in an
electrode that must be jumpered (wired) to the electrode on the adjacent
tube. |
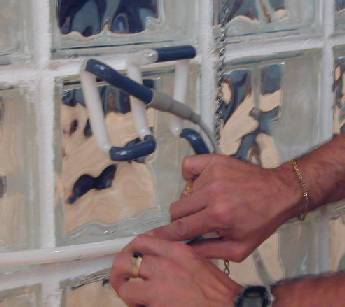 |
Here, Jimmy is cutting and sealing the high
voltage jumper wire to complete the gap |
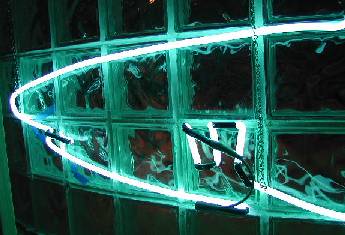 |
This is the result. The turquoise color
is the result of the color that the gas naturally glows and the inner phosphor
coating of the glass tubing. |
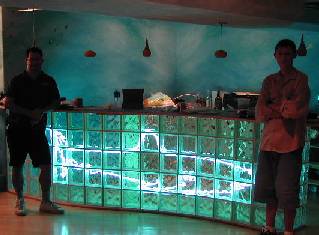 |
Immediately after installation, the shark
poses with its installers Jimmy and Jim. The result is quite
dramatic, but ultimately I figured I could get it to be more obviously
shark-like if I repositioned it with its mouth in more plain view.
To make sure I wouldn't obscure something else, I went back to the CAD
drawing and accurately modeled the mortar joints. Playing with
changing the pitch and position, I was able to get a plan that looked good
if not menacing! |
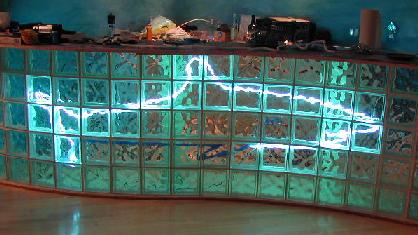 |
OK, so I broke it! It still looks
great, and the slight upward angle gives it more motion. Obviously,
I should have thought this through before the Jim's came to install
it! Click the picture to see the larger, cleaner view with the
lights in. |
 |
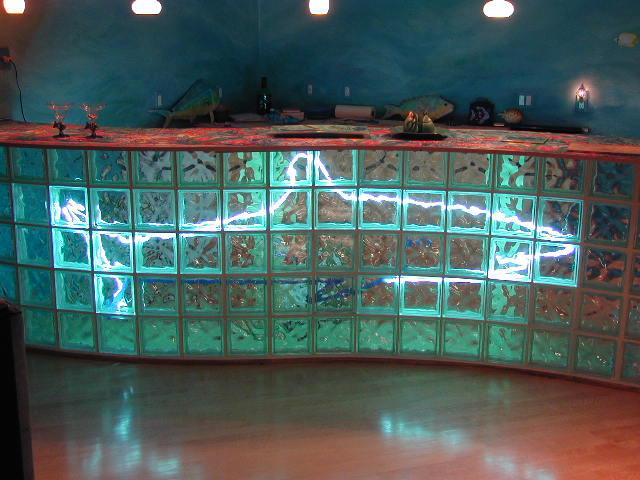
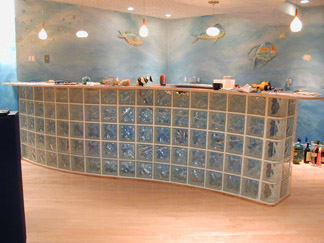
Note that the shark is now complete, the
background is in, and also some new 3D metal fish have made it to the
walls behind the bar. |
 |
Here are thee of the four removable shelf
backgrounds, after sponge painting and before installation. The
sponge painting is important so that the bar looks OK when the neon shark
is off. |
 |
The combination of the sponge painting and
distorted glass looks good with the neon both on and off. Without the painting, the white background
looked alarmingly boring. It was quite out-of-place. |
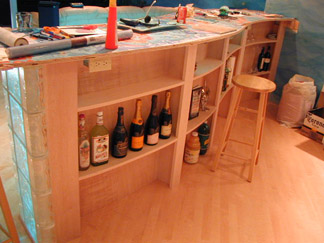 |
This is how the bar looks in back with the
shelf sections. The real function of these was to tie the back of
the bar top into the floor so that it supports the front of the bar top
cantilevered across the glass block. |