|
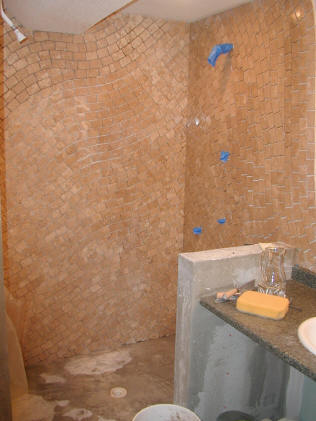
Here's an up-to-date picture of the
bathroom wall tile in the shower.... |
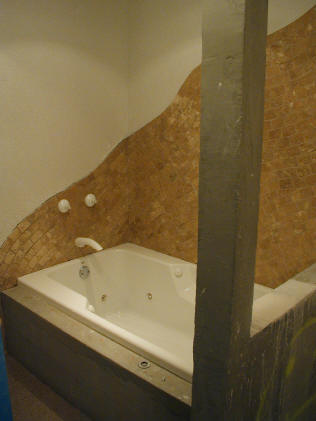 |
...And tub area. In case you got directly to this page
without hitting the "Bathroom" page above it, Here's the explanation again
of what look I was after:
On a whim, I decided that the theme of the bathroom should be that you
are entering an underwater cave, and the tile around the bathtub and shower
should support this. I wanted the tile to be relatively dark, and
especially to have natural geological "striations" just like you might see
in the Northeast on the side of the highway after they blast through the
granite. Maybe I'll go on a field trip and photograph some of these out on
Interstate 495 in Mass. |
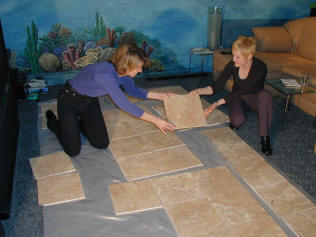 |
I already had the idea for cutting the tile
into 2" by 3" pieces at this point, and we got a deal on "filled Travertine
Noce" from the guys at Milford Granite and Marble. Interesting place.
The tiles started out as 12" by 12" before any cutting. Here,
Brenda and our good friend Sharon arrange the tiles into neighborhoods of
similar color so that I can be picky on how I mix up the colors. There
is a lot of variation in these tiles as in most natural stone. |
 |
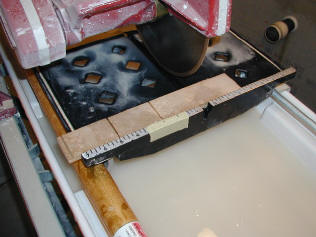
Now each tile is scored on the back into six
2" strips. The cut goes about 3/4 of the way through the stone.
The strips were actually a little under 2" so that I could have an extra cut
on each side of the tile (seen at the extreme left edge of the tile in the
picture) |
 |
Next the strips are crosscut into the roughly
3" dimension. Brenda discovered that she could keep three strips
together and crosscut the three at the same time. This saved a lot of
time. Also, I found that if the tiles were cut into trapezoids instead of
rectangles, they were much more versatile and could be used to form curves
without custom cutting. I only discovered this half way through, so I
think the shower came out better than the more visible tub.
Speaking of which, have I lectured all of you on how you should never
start the project in the most visible location? I always say this and
regret breaking the rule. |
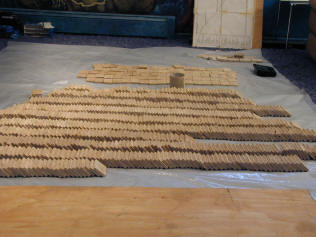 |
Anyway, here are rows of cut tile, waiting to
be arranged by color and fit in to the pattern that will be transferred to
the wall. |
 |
Arranging tiles onto the template (on the
floor) was the only relaxing part of this project. |
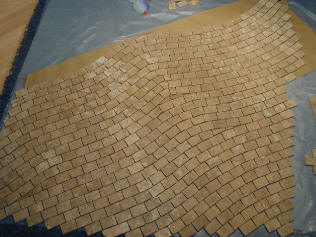 |
Pretty quickly (a few hours) you can get the
arrangement to look complete on the floor. |
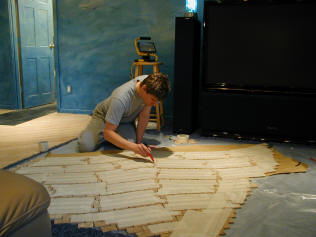 |
Nest, the entire floor arrangement is taped
with masking tape on the face of neighboring tiles. the intent is to
make a reasonably sized patch to mortar onto the wall faster than if it were
tile at a time. |
 |
.The idea is somewhat successful, in that I
can make very quick progress toward putting the tile up. |
 |
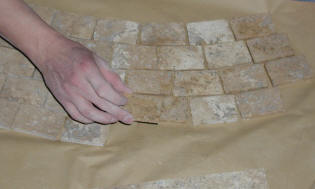
Ultimately, I'm unhappy about how little
control I have on exactly where the tiles line up with respect to each
other, and decide to try a different approach. |
 |
You can't tell from this picture, but many of the joints
are too small - some of the tiles are actually misaligned and touching
neighboring tiles. The problem there is that grout may not stay in
place where the joint is too narrow and or shallow to hold it. I'll
have to fix that later on. |
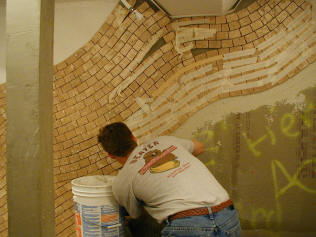 |
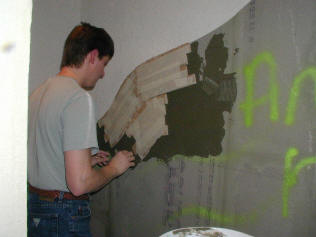
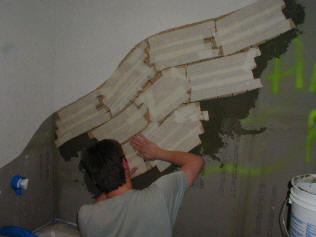
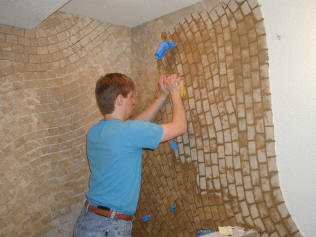
Eventually, I started placing the tiles one
at a time going through an entire numbered row and lining it up with the
previous row. the results were perfect, but this took large amounts of
time. We made small batches of mortar and stirred frequently to
increase the "pot time". For many of the rows, placement was so slow
that the combing mortar at the end of the row was setting up before we could
get the tile in.
For many of the tiles, Brenda would back-butter each tile and then I'd
place it onto the wall. Together, we could set about 3 square feet in
an hour. (!) |
 |
Blah, blah, blah, 2400 tiles... |
 |
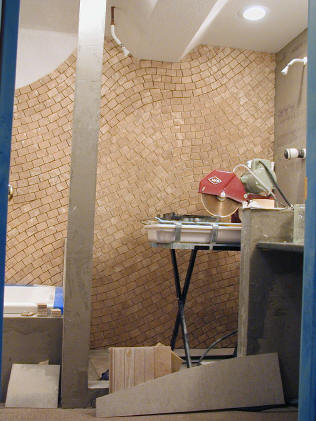
After months, all of the tiles are in. |
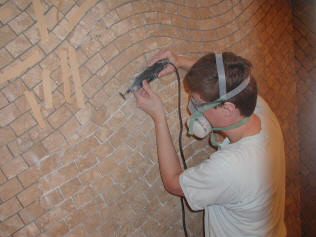 |
Now it's time to take care of that joint spacing problem.
Luckily, Limestone is extremely soft and can be easily carved with (in this
case) a Dremel rotary tool with a diamond abrasive disk. This wound up
taking only about four hours. |
 |
Here's the grouting operation in progress... |
|
|
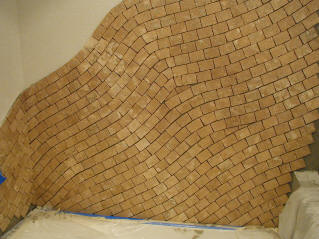
...And the same wall after grouting. the grout color is
lighter than the stone, but actually gets much darker when wet. |
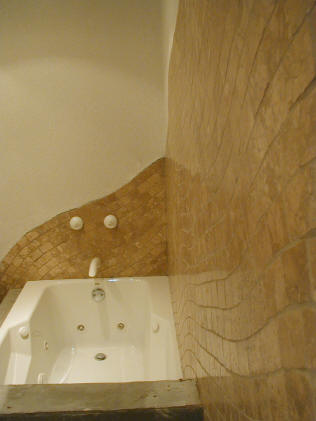 |
I like this picture for showing off the honed sheen and
the diagonal striations in the wall. The shame of it is that this view
will soon blocked by the glass block wall that is going up between the
shower and bathtub. |