 |
Bathroom
drain work including granite boulder removal
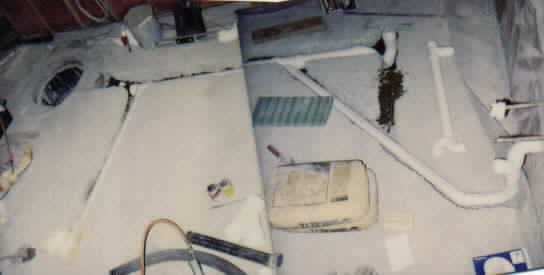
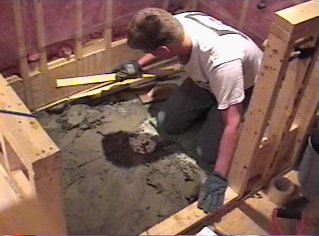
The start of the bathroom project involved running lots of drain pipe
through the concrete floor and into a drain / pump basin (upper left in picture).
The installation of the pump basin involved splitting a large chuck of
granite boulder. Click through the image to see the photos with even
more exciting details.... |
 |
Shower Floor
Details
To prepare for the waterproof membrane that will form the
sub drain for the 2" thick bed mortar, we first spread mortar around
to meet the rim of the sub drain and slope up and outward from
there. Blocking is installed continuously around the
perimeter. Now we're ready to cut and glue the plastic membrane.
All of those scary details are in the Shower
Floor Details page.
Note the half walls. Both will have glass block on them
eventually. On the left is the bathtub, and on the right will be a
vanity.
|
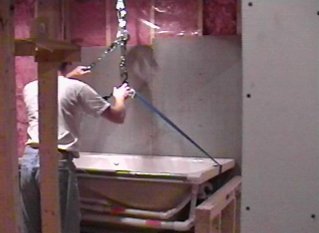 |
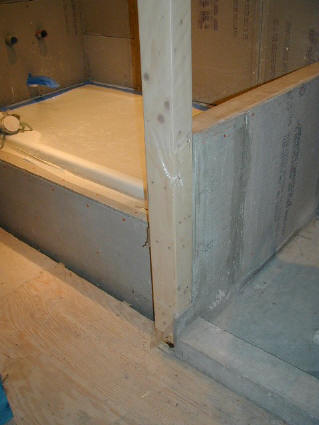
Adjacent to the shower is a whirlpool tub
that is set into fresh mortar. |
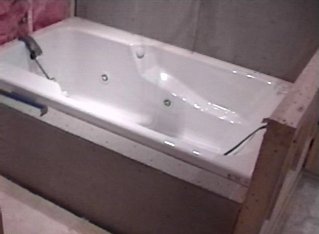 |
For extra interest, I decided a front
half-wall and tiny platform would be more attractive that the optional
plastic front that the manufacturer sells. This will be another
space I have to tile later on. |
 |
Years have gone by between the last picture
and this one, and I have now started to take up the bathroom construction
again. As the finish shape of what will go where takes form, I realize
that to have a thick glass shower door, I'll need to hinge it to something
more sturdy than glass block. So I had to take apart some of that half
wall and mount a few 2X4s in as a post. I'm hoping that I can give this
some sort of glass tile treatment so that it goes with the whole glass block
thing and doesn't look like a badly planned post to hold up a heavy glass
shower door. |
 |
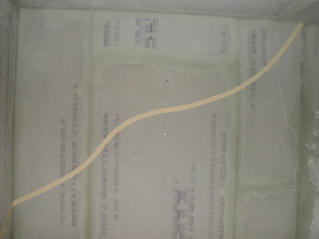
On a whim, I decided that the theme of the
bathroom should be that you are entering an underwater cave, and the tile
around the bathtub and shower should support this. I wanted the tile
to be relatively dark, and especially to have natural geological
"striations" just like you might see in the Northeast on the side of the
highway after they blast through the granite. Maybe I'll go on a field
trip and photograph some of these out on Interstate 495 in Mass. For
now, use your imagination. Anyway, once I get a firm idea like this in my
head, there's no talking me out of it. So, I stretched some tape
around the wall to mock up a jagged edge top for the the tile section of
wall and liked it immediately. Shown here is the wall over the tub
valves. |
 |
The adjacent wall is similarly treated, and
the tape hits ceiling right at the beginning of the shower over the half
wall where the glass block will go. The intent of the tape now is that
I will finish (joint compound, texture, paint, etc) over this line, and tile
under it. |
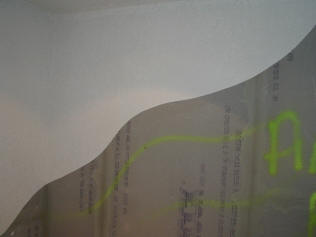 |
All of the drywall taping, finishing,
sanding, and texturing took place in the 3 days leading up to Christmas
2001. Sometime shortly after, we thought that fluorescent graffiti
might dress things up a bit. We were right. |
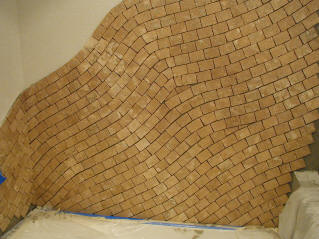 |
Limestone tile
details Same wall, but lower picture.
I bet you're seeing what I was talking about now with the striations,
right?
This tiling job has consumed more time than even the curved bar top
tiles, and I think it has been this single biggest time drain of the
project. There are roughly 2400 tiles on three walls making up only
100 square feet. I don't even want to add up the hours. In case
you like this and are thinking of doing something similar, click through the
picture to see more details and hopefully you'll be deterred. |
 |
This is reasonably current. Next
project is the glass block, and then the exciting custom fused glass tiles! |
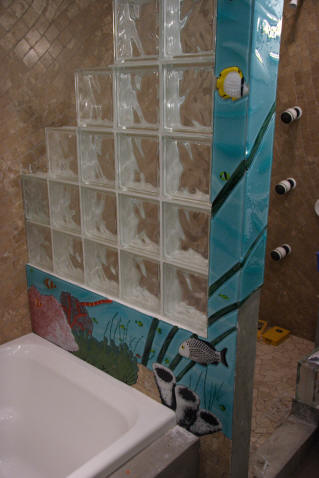 |
Here is a picture of the glass mural and the start of the
bathroom glass block work. It still needs grout and finishing, but it
is still fairly interesting. Click through for some close-ups of the
custom glass tiles that I created. |