Another tedious and mind-numbingly dull page that arrogantly assumes that
someone out there really cares how I did this. The nice thing about the
web is that you don't have to visit every page or even wait for the whole thing
to load.
If, after reading that, you still want to see the details of the railing
construction, here they are:
 |
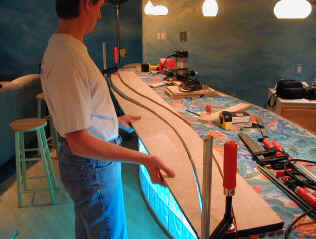
Here's what we're after:
A smoothly curving railing going completely around the bar top. The
railing should have rounded-over edges and a concave recess in which to
lean. |
 |
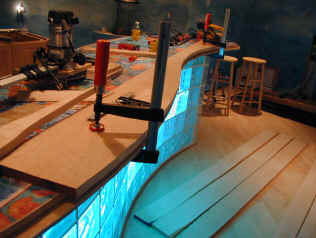
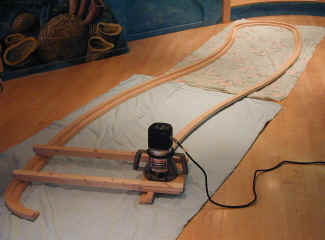
Step one is to create a temporary plywood
shelf around the entire circumference of the bar top to serve as the
routing template for the edge. This will also be used as the
platform that the whole thing gets built on. The last step will be
to remove this plywood and mount the finished railing to the bar top
itself. |
 |
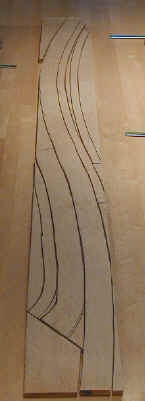
Starting from what is called "rough
lumber", I arranged the boards in color order on the floor. The
widest board, in the middle, also had some of the nicest figure, so this
became the important piece front and center in the railing. I'm sure
you can guess that this is all birdseye maple. |
 |
The wide board is clamped into place and
roughly cut oversized around the template with a jig saw. |
 |
Just for kicks, here we see the portion of
the board that is used for this part, surrounded by the remainder. |
|
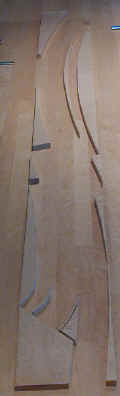
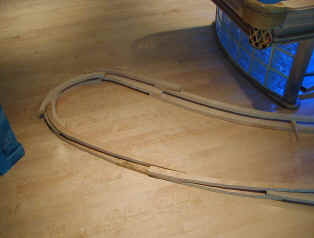
Rather than waste all of that surrounding
material, I carefully planned other pieces of the railing to come out of
what is left. Without doing this, any curvy project wastes a
tremendous amount of (expensive) wood. Another advantage is that
surrounding pieces of the same board joined to itself makes for pretty
invisible seams.
To the left is a picture of five bar segments reassembled into the
shape of the original board. To the right, is just the waste part of
the board.
I got a lot of mileage out of this board. |
 |
These are some of the rough pieces, both the
narrow segments that will be against the edge of the bar top and the wider
segments that will be above them and shaped smoothly to rest your elbows
on. |
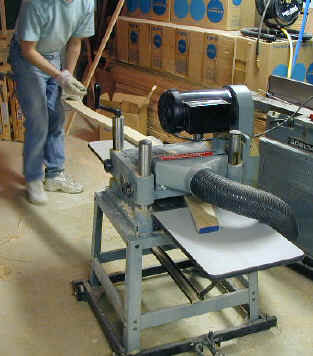 |
Next step is to plane all of these segments
to get them to a uniform thickness. Remember that the lumber is
purchased "in the rough" and not with any reliable
dimensions. 1" thick boards bought this way are pretty close to
an honest 1" thick. I planed these down to about 7/8" to
achieve a 1 3/4" total thickness, striking a nice balance between
"substantial" and "flimsy". Does anybody
actually read this? |
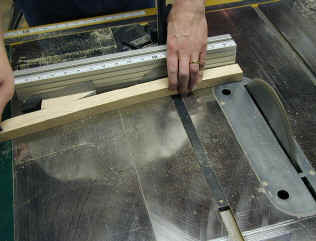 |
It's kind of tricky to crosscut a curvy
board, but a really good crosscut jig can make up for it. In this
case I move a wedge-shaped piece of scrap (to the left) to change the
angle that the blade will cut across the curvy segment.
I refuse to apologize for the lack of a blade guard and anti-kickback
mechanism in this picture. The blade guard wasn't "removed for
clarity" as they say on TV shows, it was removed for safety. A
saw without the awkward guard mechanism is less frustrating, more
predictable, more respect-inspiring, and (in my opinion) safer then one
with. And my thumb is merely hidden in the picture - it has not been
cut off. |
 |
Accurate crosscuts are important here as the
lower segments are mounted together into the plywood template. Note
that they have still not been finish trimmed to the exact size of the
template. |
 |
The finished joints should disappear.
After all of the lower segment was jointed together around the entire
circumference, the sides are flush trimmed with a router and bit that even
it up exactly to the sides of the template. This was, after
all, the primary purpose of the template. |
 |
Now for the top segment. Each piece is
carefully crosscut and matched to its neighbors exactly like the lower
segment. |
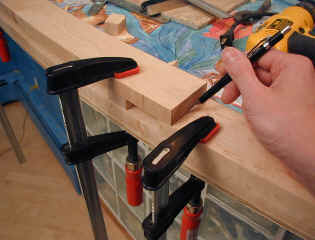 |
After one piece is trimmed, it is used to
mark the next the cut on the next piece and so on. |
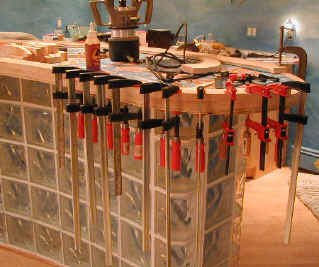 |
The the whole thing is glued and clamped
together segment by segment. |
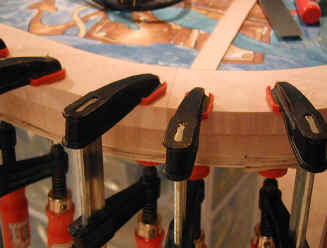 |
Any tiny gap remaining will be removed later
with wood filler. |
At this stage, the railing profile is squared off, although the outside edge is
smoothly rounded.
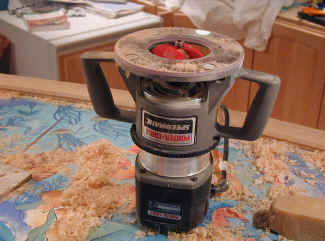 |
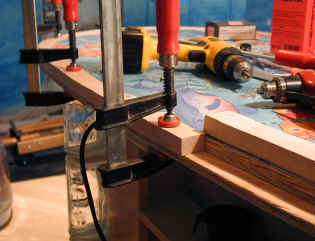
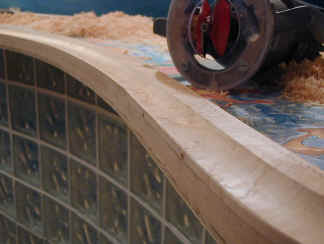
Now for the fun part. The finished
shape of the railing is the combined result of three different router
bits, and a fair amount of hand sanding. The first and predominant
shape is the concave recess in the forward edge of the railing. This
is accomplished using a large router and a raised panel bit, shown
here. Note the small bearing on the top and middle of the red
bit. It's job is to closely follow the outside edge of the railing
while the sharp edges remove exactly the right amount of wood from the top
edge. |
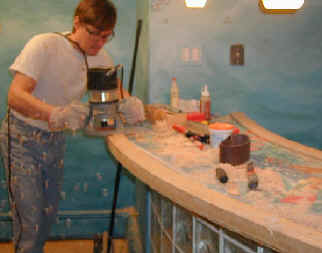 |
Although I started out doing this more or
less freehand (as shown at left), I wound up making a more elaborate sled
that held the router exactly level. You'll see this router sled a
bit later on. |
 |
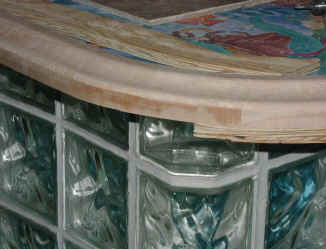
After about ten progressively deeper passes
with the router, here is the initial profile. All four edges need to
be rounded over for the finished look, but the rough shape is there. |
 |
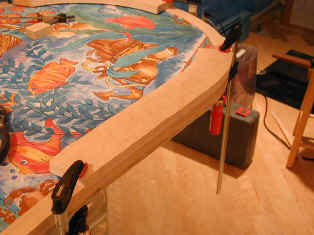
Here you can see the two top outside edges
have been rounded, and also I've started to remove the plywood template. |
 |
To round over the bottom edge, I removed the
entire railing and used the router sled in one quick pass. This is
the same router sled used in all of the other operations - I just forgot
to take pictures until now.
The top is quite stable at this point and many times it was carefully
removed and replaced by just one person. |
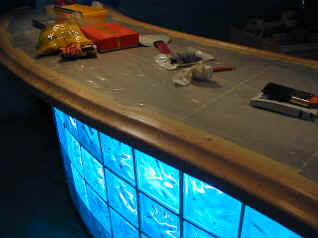 |
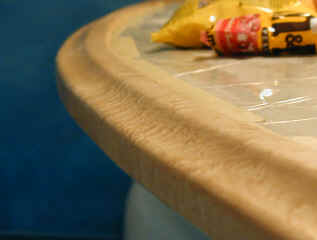
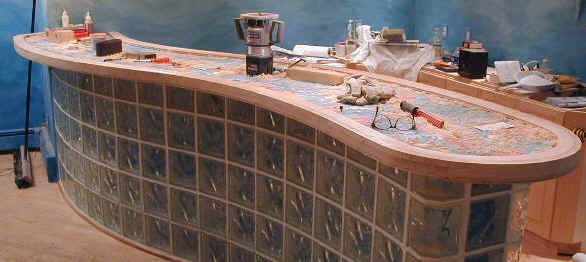
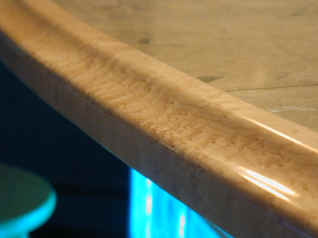
This was taken immediately after finishing
with polyurethane and before any polishing of the finish. The top surface of the
bar itself is the tile installation underneath protective plastic.
Most wood finishes must be rubbed out in order to get the maximum
flatness and sheen!
|
 |
And here's the proof. This is ordinary,
brushed-on Home Depot polyurethane with no additional preparation besides
sanding to 150 grit. The third coat was lightly sanded with 400 and
600 grit sandpaper to clean up drips, bubbles and brush marks. It
was then rubbed up to a dull finish with 0000 steel wool. The real
shine comes from a high speed buffer (but you can do this by hand) working
with 2F medium and then 4F fine pumice. I have one grit even finer
than that, but this looked good enough.
Click on the image for full size!
|
|